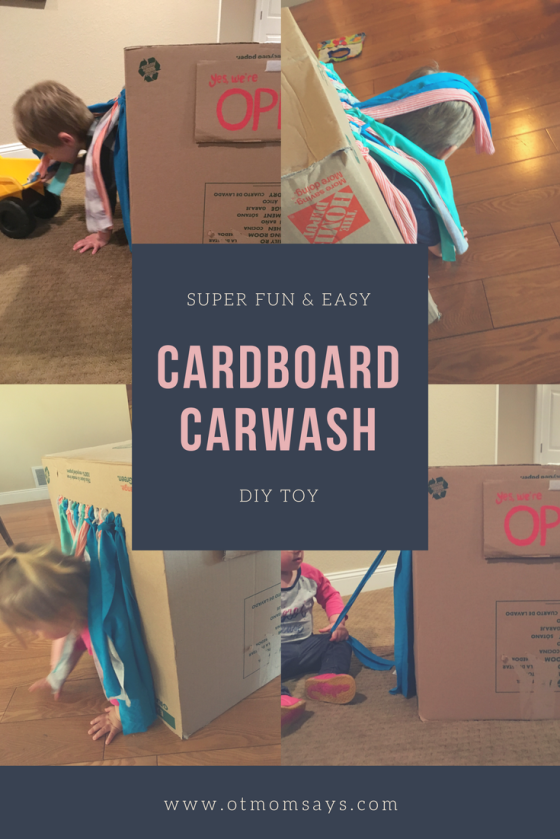
My son (once again) said, “Maybe go to the carwash today.”
OT mom said, “Instead, let’s play car wash!”
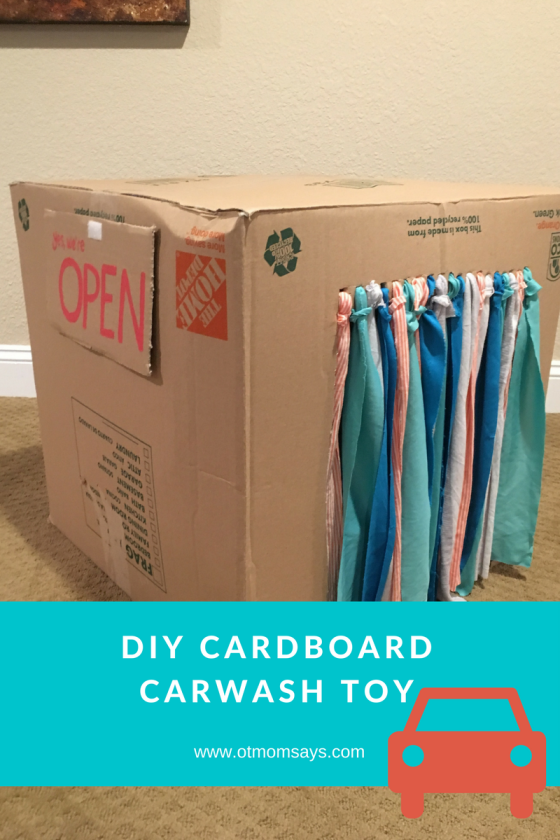
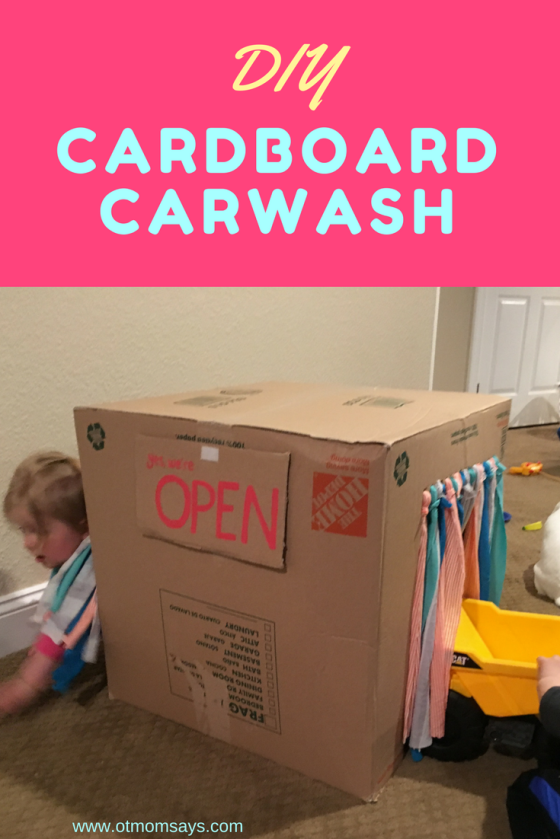
My son’s current obsession is anything carwash. Just about everyday, he asks if we can go to the carwash when we are out running errands. His love for playing carwash inspired my latest activity idea: a fun, DIY crawl through car wash!
The kids can play with this several ways: by actually pretending they are the “cars” or using it to wash their big toy cars and trucks by pushing them through. It has proven to be extremely entertaining for their busy minds, and in addition to the great imagination and pretend play engagement it promotes, there are additional hidden benefits as well.
Crawling through the tunnel gives my kids a dose of proprioceptive input, which can do wonders for regulating the sensory system. Click here to learn more about proprioceptive input.
By weight bearing on extended arms during crawling, it also provides strengthening for the shoulders, arms, core, and even the muscles of the hands. Putting weight through open hands strengthens the arches in the hands- which will be important for the development of handwriting and other fine motor skills.
While pushing cars through the car wash tunnel, you may notice a child using one hand on the ground to stabilize, and the other hand to push the car through. This promotes dissociation of the two sides of the body and allows for practice with crossing midline and bilateral coordination skills.
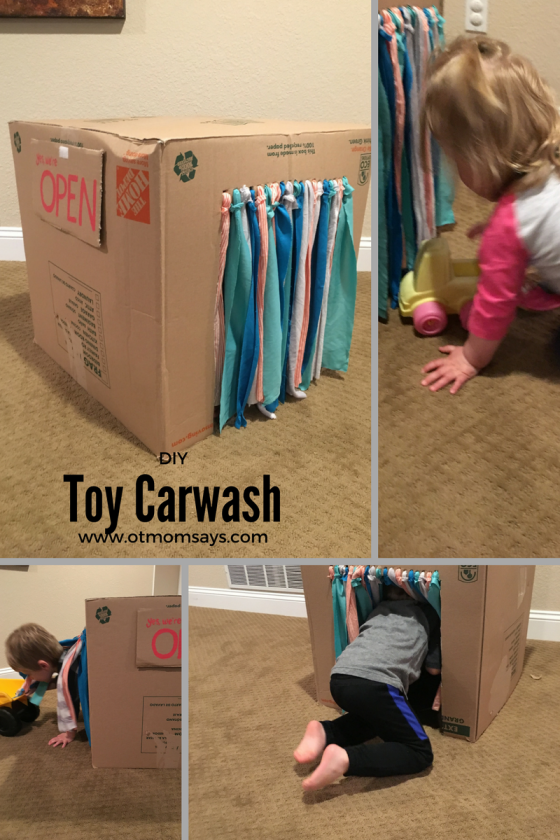
My son didn’t play with the car wash the same way the whole time this evening. He tried to wash his wagon, his truck, and he pretended to be the car. By moving his body (and toys) through the makeshift car wash, he had the opportunity to work on his motor planning and praxis skills. The development of such skills relies on using novelty in movement sequences.
But the list goes on… we made our car wash “scrubbers,” as my son calls them, brightly colored and slightly different fabrics, so my daughter enjoyed the tactile discrimination aspect of playing with the wash. We added an “open” and “closed” sign for fun (and it stayed open all evening). I was pleasantly surprised with my kids’ ability to take turns moving through the car wash and sharing their space- a thing I think most siblings have trouble with.
The bonus was that I didn’t spend a penny on this project- I used scrap fabric and a leftover moving box. It feels good to save money and reuse old items.
So here’s how I made it:
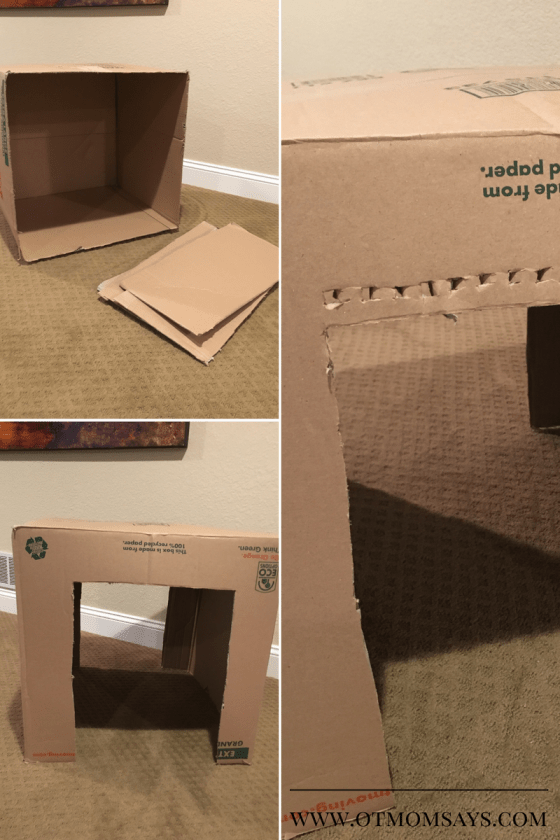
I started with an extra large moving box, with one end taped. Using a utility knife, I cut off the flaps from one side. (Please use caution with the utility knife).
Next, cut out a door for each side. Above the door, cut small holes about 1/2 an inch above the doorway. I didn’t measure initially, I just eyeballed the size based on the size of my kids and their toys. It turned out to be about 14 inches wide and just over 17 inches high.
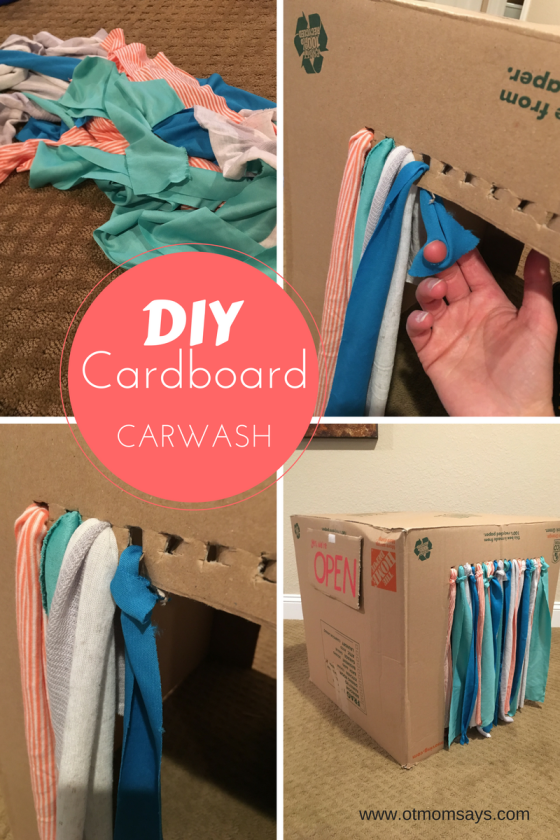
I used fabric strips to make the “scrubbers” (I had some leftover from another project or you could use scrap clothes, etc). I didn’t measure these initially, but they were about 2-3 inches in width by about 19 inches long.
Once you have your fabric strips, cut a small hole from about 1/2 inch from the end and feed that through a hole in the box. To secure, feed the opposite end of the fabric through the hole and pull snug. Continue until all the holes have scrubbers.
Since kids don’t seem to mind if things aren’t measured perfectly, it was a pretty quick project to complete.
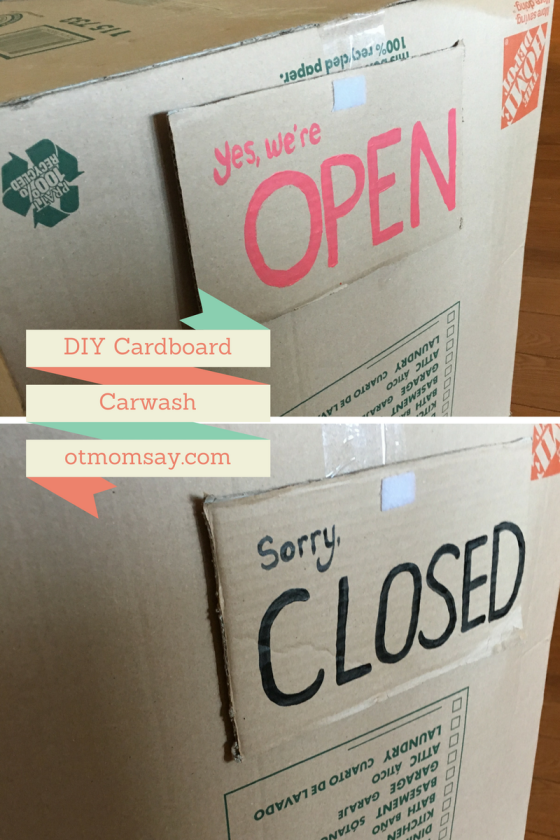
Just for fun I used some scrap cardboard and sticky-back velcro to make an “Open/Close” sign for the carwash. You could easily do this with markers or paint. It’s as easy as that!
If you decide to try this easy, beneficial DIY activity, please remember to keep your kids supervised for this activity! I’d love to hear how your kids liked it!
*Disclaimer
Please use supervision with this activity, as young children or children with motor skills difficulties may get tangled up in the fabric strips.
The information presented in the blog is intended for information purposes only. Please consult your physician with any medical concerns and/or for medical advice. The information presented is not intended to be used in place of individualized therapy services, please contact your health care team for skilled therapy if you think it is necessary. Please supervise your children (or friends, spouses, etc) if you decide to try any of the activities or ideas presented as the author or this blog does not claim liability for possible injury or negative consequences related to the activities and ideas presented here.


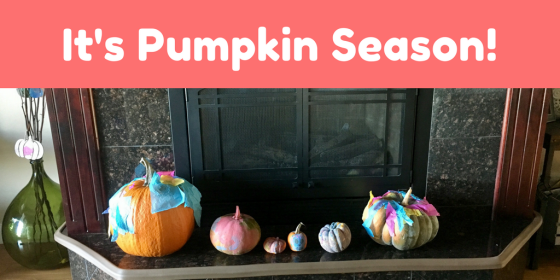
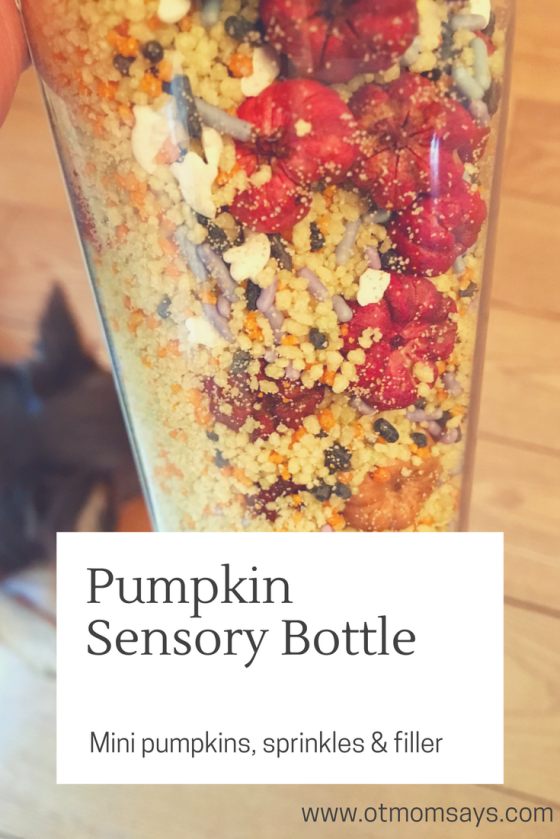
 Pumpkin “Sensory Bin” Center Piece